Get ready to roll into a world of sweet, edible fun! This guide will walk you through making charming royal icing tractor cookies, perfect for any occasion. Whether you're a seasoned baker or a complete novice, you’ll be amazed at how easy it is to create these adorable treats. Let's get started!
Getting Started: Ingredients and Equipment
Before you begin, gather your baking essentials. You'll need a reliable sugar cookie recipe (many excellent options are readily available online!), along with these key components:
- Royal Icing: (Recipe below) This is the star of the show!
- Food Coloring Gels: Vibrant colors bring your tractors to life. Gel food coloring provides the most intense shades.
- Piping Bags and Tips: Various sizes are helpful to create different effects. If you don't have piping bags, zip-top bags with a small corner snipped off work surprisingly well!
- Cookie Cutters: Tractor-shaped cutters are ideal, but you can also use rectangular cutters and pipe on the details.
- Parchment Paper: This prevents sticking and makes cleanup a breeze.
- Sprinkles (Optional): For adding extra sparkle and personality.
Whipping Up the Perfect Royal Icing
The secret to stunning cookies lies in the royal icing. This recipe yields a delicious and versatile icing for both outlining and flooding:
- 4 large egg whites, at room temperature
- 4 cups powdered sugar, sifted
- 1/2 teaspoon cream of tartar
- 1 teaspoon vanilla extract
- 1/4 cup water
- Optional: A dash of lemon juice for extra shine.
In a large bowl, beat the egg whites with an electric mixer until soft peaks form. Gradually add the powdered sugar, cream of tartar, and vanilla extract, mixing on low speed until combined. Slowly add the water, mixing until the icing is smooth and glossy. If desired, add a few drops of lemon juice for extra gloss. Did you know that adding a dash of lemon juice can also help prevent cracking?
Baking the Perfect Cookie Base
Now, bake your sugar cookies according to your chosen recipe. Ensure they are completely cooled before decorating. Remember to let them cool completely on a wire rack to avoid a soggy bottom! How long does it typically take to cool sugar cookies completely? Usually, about 30 minutes.
The Decorating Adventure Begins!
Outlining (The Foundation): Using a thicker consistency royal icing (add a bit more powdered sugar if necessary), carefully outline each cookie with a piping bag and small round tip. Think of this as building a "dam" to hold your flood icing. This step is crucial for preventing your colors from bleeding together.
Flooding (Filling the Gaps): Once the outlines are set, thin your royal icing with a little extra water until it's easily pourable. Fill each outlined area with the thinner icing, using a toothpick to gently smooth out any air bubbles. Let this layer dry completely.
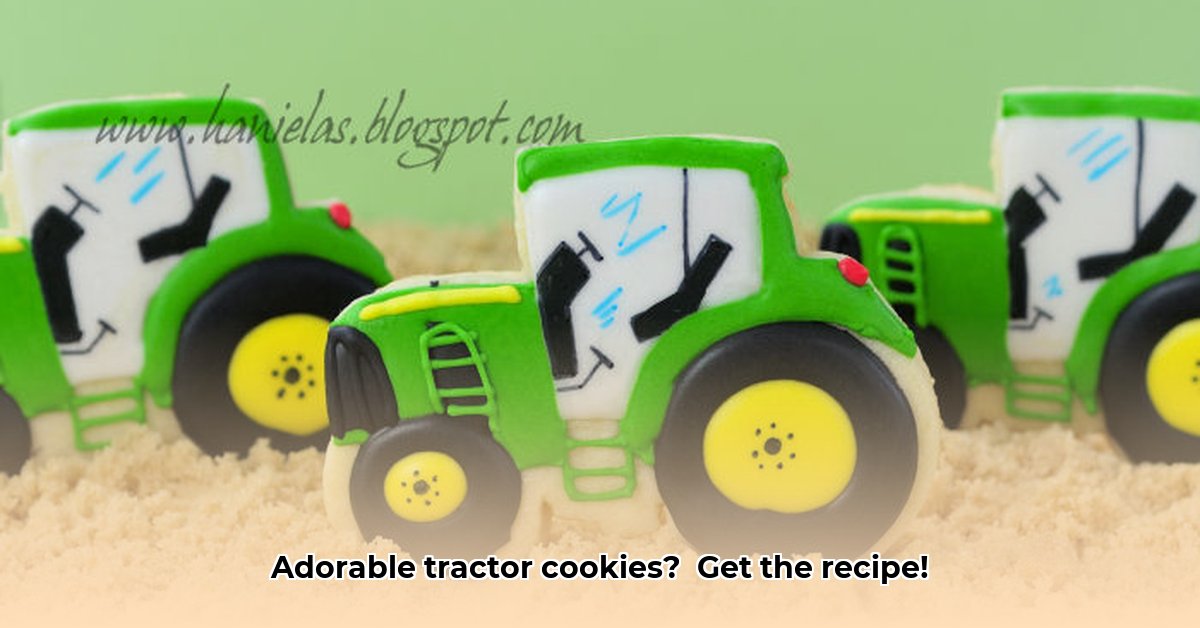
Adding the Details (The Finishing Touches): Once the flood icing is dry, it's time to add the fun details! Using your thicker consistency royal icing and various piping tips, add the wheels, headlights, and any other charming tractor features you desire. Experiment with different colors and techniques to create unique designs.
Adding Color and Flair (Personalization): Use different colored icings to make your tractors unique and vibrant! Feel free to add sprinkles or other edible decorations, and don't be afraid to express your creativity.
Key Takeaways and Tips for Success:
- Fresh Ingredients: Using fresh, high-quality ingredients ensures the best results.
- Consistency is Key: Achieving the right consistency for both outlining and flooding icings is crucial for a professional look.
- Drying Time: Allowing sufficient drying time between icing stages is essential to prevent smudging and maintain crisp lines.
- Practice Makes Perfect: If you're new to piping, it's a great idea to practice on a piece of parchment paper first.
- Have Fun! The most important thing is to relax and enjoy the process. Your unique touch will make your cookies truly special!
With a bit of practice and patience, you'll be creating a fleet of adorable royal icing tractor cookies that are almost too cute to eat (almost!). Enjoy the process, and happy baking!